


Associate Editor

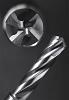
Faster cutting speeds help raise the temperature slightly, which generates a better surface finish. It also prevents that material from sticking to the top or the face of the insert. Greenleaf
At the finishing stage of turning operations, the last thing any operator wants to do is scrap a part because of poor surface finish quality. Shops need to take many factors into account to improve surface finish and meet customer specifications. The experts agree that proper inserts and cutting parameters are essential, but so is taking a holistic approach to producing better surface finishes.
Jan Andersson of YG-1 and Matt Goss and Paul Lobsinger of Greenleaf Corp. offer some tips that can help operators improve turning finishes.
“Shops need to think about the turning process as a complete chain,” said Jan Andersson, director, product management, indexable inserts for Americas, YG-1, Vernon Hills, Ill. “It’s important to think of all the steps, from the roughing all the way through finishing, because they are all connected, interlinked, and interdependent.”
To ensure a high-quality surface finish, operators need to take off the right amount of material in the roughing and medium stages so that finishing can take place with few or no errors. Any issues during earlier stages can lead to poor surface quality.
“Roughing should remove enough material so that the finishing tool is not cutting over the radius,” said Paul Lobsinger, sales and service engineer Canada, Greenleaf Corp., Saegertown, Pa. “This will help to prevent notching of the finishing tool. Roughing operations tend to use heavier feeds, which can lead to scallops on the walls of the shoulder. These scallops can be very hard and lead to very poor insert life if they are found on the part during finishing operations. Roughing tools should be programmed to remove the scallops, and steps need to be taken to provide the best possible surface for the finishing stage.”
Lobsinger added that features such as full circle holes in the face of the part should be added after the finishing process rather than before. By incorporating the holes after the finishing operation, the operator does not need to perform interrupted cuts, which can be detrimental to surface finish quality.
“If you look at a green-state machining or soft steel turning machining, the operator needs to produce a good enough surface finish in early stages to achieve the necessary surface in finishing,” said Andersson. “If you start looking at hardened steel components, the surface finish of a roughing pass before heat treating will tremendously impact the final surface finish that can be produced after heat treating.”
“With finishing you're going to be using the higher surface footage, so faster speeds with lower feed rates,” said Matt Goss, applications engineer and project development, Greenleaf Corp. “And, generally, you're going to have a smaller depth of cut. But it's also important that you make sure the feed rate coincides appropriately with your desired surface finish. If you're using too light of a feed rate, it can cause excessive rubbing and premature wear of the insert, which is going to lead to poor surface finish.”
Faster cutting speeds help raise the temperature slightly, which generates a better surface finish. It also prevents that material from sticking to the top or the face of the insert. Operators should increase the speed slightly compared to roughing applications, but not so much that it will have a negative impact. If built-up edge on the flank of the insert occurs, the feed should be increased.
Andersson pointed out that many shops tend to drop the speed compared to roughing applications, which is a common mistake for finishing operations. Increasing the speed is necessary to achieve a quality surface finish.

A toolholder pocket that is too open can reduce the contact area between the insert (for example, with WNMG inserts) and the pocket, which then introduces movement into the pocket. This leads to microvibration, which has a negative impact on surface finish. YG-1
Determining the correct depth of the cut (DOC) will help with the stability of the turning process. A DOC that is too small leads the nose radius to put all forces into the component radially, which introduces vibration and negatively affects surface finish.
“Typically, a 0.02-in. DOC is ideal for finishing applications,” said Andersson. “It’s also important not to take too large a DOC, as most of the material should be removed in the roughing and medium stages. You generally want a light DOC and a lower feed rate.”
Using the best insert for an application helps to produce quality cuts. Speaking with insert manufacturers about new applications can help determine which insert will produce a quality surface finish in turning operations. The machining conditions and component material determine what type of insert is appropriate, but some general features can be recommended for the finishing stage.
“A larger radius is typically preferred in finishing so long as the part geometry allows for it,” said Goss. “The larger radius helps to more efficiently smooth out the material and acts almost as a wiper. With a larger nose radius, you can up the feed rate slightly while still maintaining that high surface quality. In thin-walled applications however, a smaller nose radius will reduce radial cutting forces, which may lead to deflection and vibration that can negatively affect surface finish.”
Microgeometry and edge line condition of the insert have a tremendous impact on the initial chip formation and surface finish.
“This is especially important when we start getting into the superalloys,” said Andersson. “Many industries, like aerospace manufacturers, require the use of G- tolerance inserts versus M-tolerance inserts in finishing. The quality of the microgeometry of a G tolerance insert can really impact the surface finish, and this will help not only industry-specific applications, but anyone looking for the high-quality surface finish in difficult-to-cut materials.”
“Wipers are so useful during the roughing and even medium stages of the turning process,” said Andersson. “When we think of wipers, we automatically think of finishing operations, but they are used to generate good surface finish in other parts of the process.”
Using wipers allows for increased feed rates, within the appropriate range for the finishing stage, while reducing the contact time, meaning longer tool life. The higher feed rate also leads to better chip control and evacuation, which helps to improve surface quality.
“Chipbreakers are absolutely recommended,” said Andersson. “There’s no question about it. When you start looking at the macrogeometry, the top surface of the insert is in direct relationship to the material machining and the chip area. So, if you're taking a lower DOC with a lower feed rate, the chipbreakers will look different than if you take a higher DOC with a higher feed rate. You need the right chipbreaker for the material, because chipbreaking will become crucial to maintain a good surface finish consistently, especially across multiple parts.”
A chipbreaker for finishing tends to have a smaller or thinner edge profile and either a lighter or no hone; then that's followed by a narrower or deeper chip gullet, said Goss.

For finishing, Greenleaf recommends a ceramic insert with a smaller land, and a sharp edge with no hone if the material is soft. Greenleaf
“This creates a sharper edge for the insert, which allows it to more efficiently and effectively shear the material during the finish operation,” he added. “Ceramic inserts typically don't have chipbreakers; instead we look at the cutting edge preparation, which is usually a combination of lands and hones. For finishing, we recommend an insert with a smaller land, and a sharp edge with no hone if the material is softer. However, for any material 50 Rockwell C or higher, we typically lean towards an insert with a light hone on the cutting edge to help provide a little bit more protection and keep the edge from chipping.”
Andersson noted that one overlooked aspect of this process is how the insert grade, particularly as it relates to coatings, affects surface finish.
“When it comes to a physical vapour deposition (PVD) versus a chemical vapour deposition (CVD) coating, the CVD coating tends to be much thicker than a PVD coating,” said Andersson. “With a thicker coating, you are going to have a greater challenge of producing a quality surface finish than with a thinner coating, and this holds true every single time. PVD produces a better surface finish than a CVD coating because of coating adhesion. A PVD insert will have full coating on all surfaces of the insert, whereas CVD will have reduced coating right on the microgeometry, changing the shape of the microgeometry.”
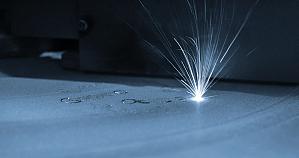
For most turning operations, high-pressure coolant aimed directly at the cutting edge is recommended. This helps to clear chips out of the cutting zone. Chip control is essential in maintaining a quality finish. Clearing out the chips keeps the tool from recutting chips, which can damage the edge of the tool. It also prevents the chips from curling around the tool and moving across the workpiece surface, potentially leading to scratches or flaws in the finish.
“Coolant helps keep the part and the tool cool so you can cut at faster speeds,” said Goss. “If high-pressure coolant isn't available, conventional or flood coolant would be the next best option.”
However, Goss noted that coolant is not recommended for all applications. For turning hardened materials -- anything over 50 Rockwell C, using a ceramic insert -- coolant should be avoided, as it has a tendency to thermal-shock the insert, which can lead to fracturing. But if the material is on the softer side, coolant can be used with a ceramic insert.
“Chip control is essential because with this process, we need to use the chip area for thermal evacuation,” said Andersson. “You have to raise the temperature so that it is both high and even, but you also need sufficient chip area. If you reduce the chip area, there is less mass to transport that heat away from the cutting zone and you will start seeing the effect of chemical, flank, and crater wear on the insert. Chip control really becomes a challenge when you're looking at surface finishing. So that's why you have to select the right geometry and maintain proper cutting parameters for a given application.”
The experts agree that tooling and fixturing play significant roles in achieving a quality surface finish. If fixturing is not rigid, it can lead to chatter, which could compromise the finish. It’s also important to make sure the toolholder has the shortest possible hangout to help keep it rigid. The workpiece and cutting tool should be adequately supported so that there is no vibration during the finishing operation.
“One thing people don't necessarily think about is how the inserts sits in the pocket,” said Andersson. “The pocket design can play a significant role. A toolholder pocket that is too open can reduce the contact area between the insert and the pocket (for example, WNMG inserts), which then introduces movement into the pocket. This leads to microvibration, which has a negative impact on surface finish.”
Movement on the insert also makes it difficult to maintain dimensional tolerances on the component. The pocket should be suited for the insert and kept in good condition. There should be no wear or deformation, as even the slightest movement has consequences.
“The best way to produce a good surface finish is to start with the insert manufacturer and look at the cutting recommendations,” said Andersson. “It will give a good starting point. You can make adjustments along the way, but the recommendations are based on years of R&D and shop knowledge, so take advantage of the expertise.”
Choosing an insert with a positive rake angle is preferred for finishing. According to Goss, a positive rake angle helps create a sharp edge for shearing off the material. For the roughing stage, he suggested working with a negative rake, because it's going to put more strength behind the cutting edge to remove more material, providing a better starting point for the finishing stage.
“The other thing to think about here is a directional force,” said Andersson. “In the finishing stage, you want to put as much of your force as you can axially along the component, because that will give you the stability needed. Choosing an insert that offers as close to a 0-degree entry angle will give you more force along the axis, but you also need increased back-clearance of the insert to get that quality surface finish.”
Andersson added that force management is a significant factor when it comes to the finishing stage of turning operations. The tangential force, which is axial force plus radial force, can be treated as a constant in turning. If operators increase the axial force, they reduce the impact of the radial force, which allows them to hold better tolerances and reduce microvibration because of the reduced natural instabilities. He added that this is not necessarily as much of a consideration during the roughing and medium stage of the process.
“The direction in which the tool is cutting can also be important to pay attention to,” said Lobsinger. “You want to make sure that you are directing the forces of the operation into a well-supported portion of the part; machining away from the support can lead to vibration, which can also affect tool life, and your surface finishing will definitely be compromised.”
Lobsinger added that in cases where the operator runs into chatter, varying the RPM cycle, where the SFM varies between low and high, can help get rid of or at least reduce harmonics. This programming tip can help improve turning finishes.
Associate Editor Lindsay Luminoso can be reached at lluminoso@canadianmetalworking.com.
Greenleaf Corp., www.greenleafcorporation.com
YG-1, www.yg1.ca


Keep up to date with the latest news, events, and technology for all things metal from our pair of monthly magazines written specifically for Canadian manufacturers!
Start Your Free Subscription
Easily access valuable industry resources now with full access to the digital edition of Canadian Metalworking.

Easily access valuable industry resources now with full access to the digital edition of Canadian Fabricating & Welding.