


Where Is Your Press Brake Tooling?
Solid organization provides the foundation for improvement in bending
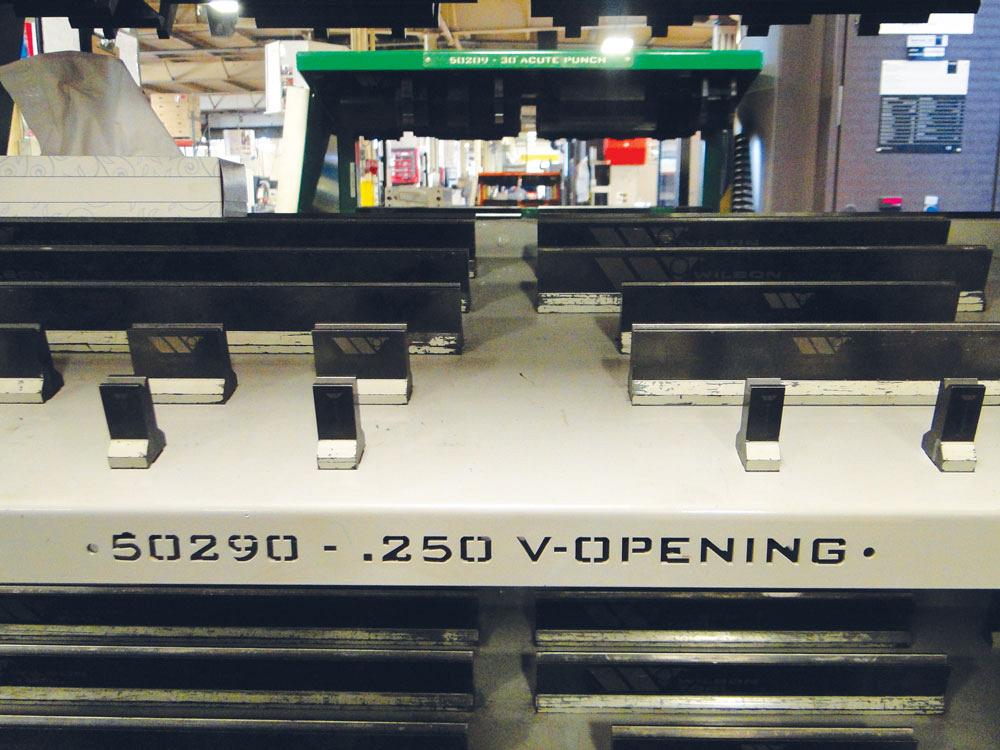
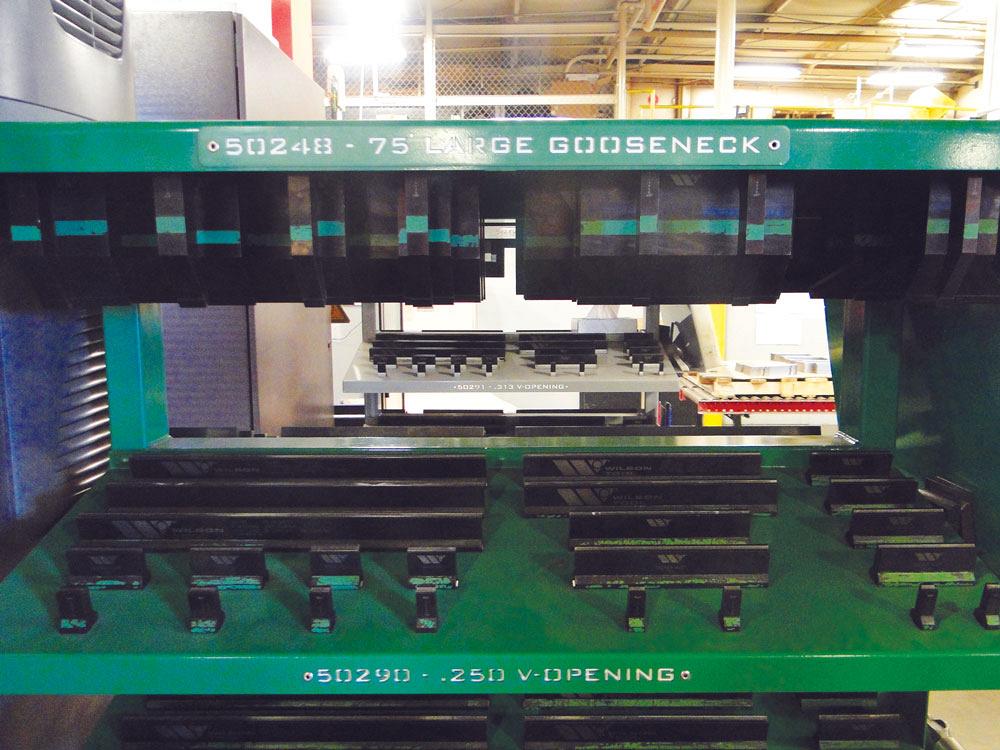
This rack makes tool storage locations clear even for the newest hire. Photo courtesy of DeWys Mfg. Inc.
If you perform a time study of a typical press brake operation, you’ll probably uncover a significant amount of time between the last good part of the previous job and the first good part of the next job. Operators may spend a good portion of that downtime away from the machine, searching for the material and tools they need. In lean manufacturing, that’s a classic waste.
By situating everything in a common- sense fashion, you reduce non-value-added activity. Customers aren’t paying operators to comb through a box or rack of tools. They’re paying for good parts. If operators are bending more parts in less time, the cost per part goes down, and the return on investment for your bending equipment is faster.
It boils down to this: Organized workstation = Productive operator = Greater throughput = Lower cost per part = Increased profitability.
A lot of decisions behind tool organization depend on the operation and job mix. For instance, how far in advance do operators know what they will be running? This may affect how and where tooling is stored. Does your operation use conventional or precision-ground tooling? What are operators’ personal preferences? What works for one technician may not work for someone else.
But some steps to good organization are universal. Laying unlabeled tools haphazardly in boxes or stacked on top of one another isn’t good practice, no matter the situation. As with so much in continuous improvement, tool organization requires the right culture. Operators who take ownership over their areas are the most productive.
Layout Strategy
Shop layout should reflect common sense. Try to focus everything on the press brake. All paths the operator walks from the storage area to the machine should be kept short and sweet to minimize operator steps and fatigue. When possible, always try storing tools at the point of use. Having a tooling rack in a back room, away from the brake area, fosters a lot of wasted movement.
For some shops, this might mean putting a storage unit equidistant to several brakes, or it might mean situating a cabinet next to each brake. Mobile tooling carts can help, too, especially for job shops that process various parts every day. Some carts may carry specific tool types used for certain product types or families, and material handlers or operators can move those carts into position when needed for the changeover. Whichever way you do it, make sure operators can access the tools without a lot of unnecessary movement.
Open and Closed Racks
Some prefer open-air storage racks because operators can identify the tools they need immediately without opening a drawer. The racks should have clear labels so operators know immediately where the tooling belongs. People aren’t perfect; they misplace tools now and then. But with the right racking system, with obvious visual cues, technicians can find the tool before it becomes a problem during a job changeover. The last thing you want is an operator hunting for the right tool while his or her press brake sits idle.
However, tools left in open-air storage units can collect shop debris and dust, which can affect the tool’s bending surface. To avoid this, be sure to clean dust and debris from the tooling regularly. Open-air storage racks, especially ones made of sheet metal, can damage tooling over time, as punches and dies are removed and returned. Never rest the punch tip on the sheet metal, and, of course, never simply throw a tool down on the rack; both practices can cause premature tool wear.
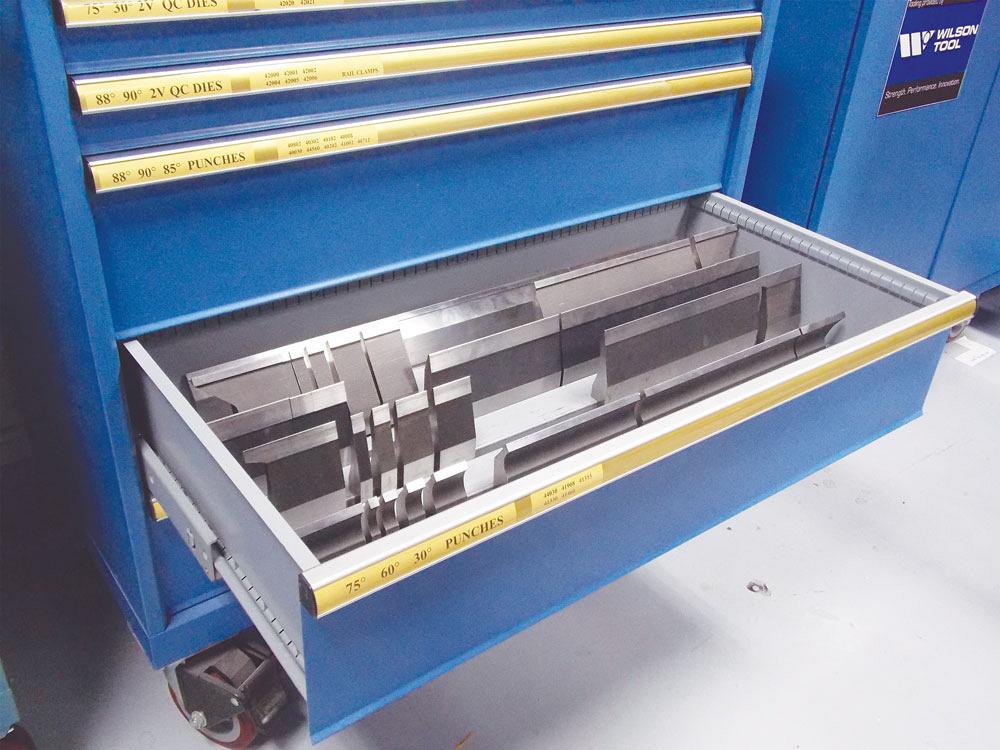
Closed storage cabinets keep your tooling free of shop dust, and their interiors are often made out of material that doesn’t wear tools. You need to affix labels on the outside and inside of the drawer, where every tool has its place. When operators pull a drawer open and see an empty space, they should be able to see the label and know exactly which tool should be there.
Open racks with clear labels show operators exactly where tools belong. Photo courtesy of DeWys Mfg. Inc.
Tool Identification
Be sure tool labels have enough information not only for veterans but also rookies. If a shop has years’ worth of tooling that’s been inconsistently labeled, or not labeled at all, such standardization can take time, but the effort will pay off in the end.
For those who prefer to have a visual of the tool rather than words or numbers, you can use a sticker of the tool profile. But whether you use words, images, or both to identify tooling really doesn’t matter. What does matter is consistency. The labeling method should be the same on the tool, the setup sheet, the shop software—everywhere. Every employee should be able to read the label and know what it means. Clear labeling—on tool racks, cabinets, and on the tools themselves—not only makes bending operations more efficient, but it also makes the training of new hires a lot easier.
You also may want to try color coding. This can be especially effective if multiple languages are spoken in the shop. On the other hand, you need to make sure people aren’t color-blind. Using a color coded-based system isn’t as universal as you might think.
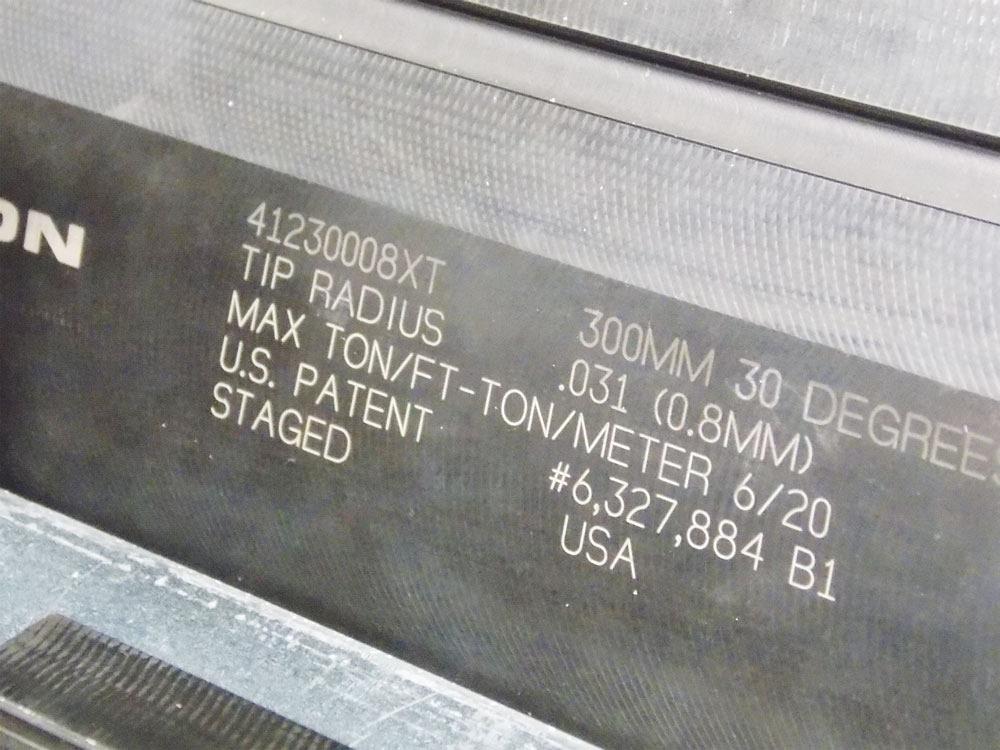
Some tooling identification marks are laser-etched onto the punch and die themselves. Other shops simply use labels or markers. Whatever the method, make sure the label identifies the tool’s important characteristics. Punch labels should show the tip radius, angle, tonnage, and length; die labels should include the V opening and angle, in addition to the tonnage and the length.
Some storage units allow tools to hang from the top of the shelf, other units allow for tools to be stored tipup, and both are great for protecting tools from damage. But the way tools are situated matters, because their orientation may obscure their label. All pertinent information about the tool should be immediately visible to the person looking at the tool in the drawer or on the rack.
Dedicated Tooling
Some shops might have all the right tooling, but they don’t have enough of it, so technicians need to share. No matter how organized your tools are, if an operator needs a tool that’s in use, he still needs to wait to finish the job. Sure, he can jump to another job on the schedule, but he may be making unneeded work-in-process, and this can snowball into larger problems downstream.
Investing in dedicated tools for specific machines can make a lot of sense. It simplifies tool organization and ensures that an operator always has the tools he needs.
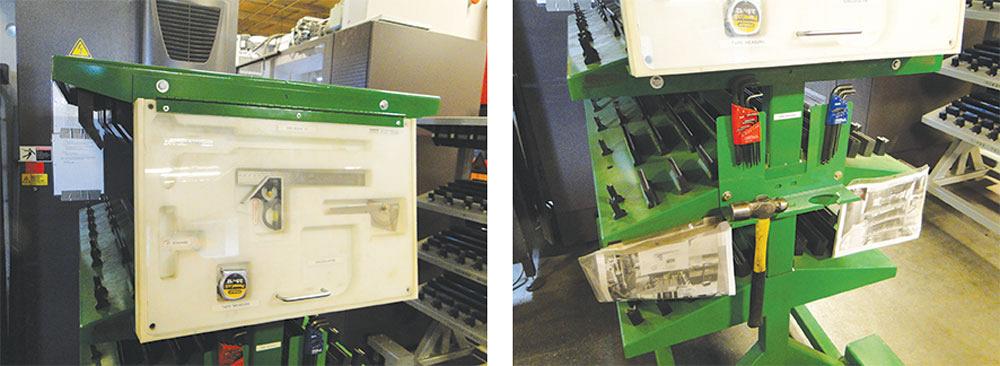
Shadow Boards
This is another must-have. Shadow boards help operators find secondary, or peripheral, tools they need to measure parts and load/unload the punches and dies during changeover. Make sure each brake has dedicated peripheral tools; operators shouldn’t have to wait to use something as simple as an Allen wrench.
When designing these boards, pay attention to the operators’ needs. How often do they use this wrench or that caliper? Ideally, operators should spend no time searching for what they need.
subscribe now

Keep up to date with the latest news, events, and technology for all things metal from our pair of monthly magazines written specifically for Canadian manufacturers!
Start Your Free Subscription- Stay connected from anywhere

Easily access valuable industry resources now with full access to the digital edition of Canadian Metalworking.
Easily access valuable industry resources now with full access to the digital edition of Canadian Fabricating & Welding.
- Trending Articles